Monday, September 19, 2016

Flying with your photographic equipment


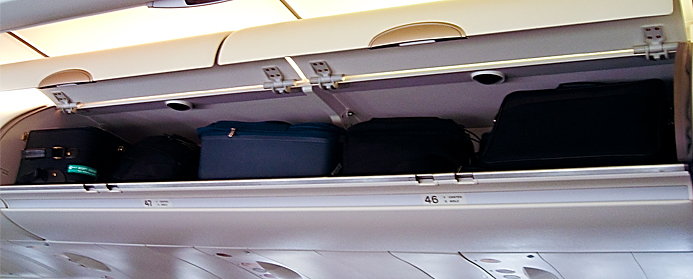
Lots of our customers take equipment overseas, but what they don't always appreciate is that some airlines - including some that you might otherwise think of as "decent" airlines - are surprisingly stingy with their carry-on allowances. This can limit the maximum bag size and, perhaps even more importantly for photographers, weight. Obviously we all want our photographic equipment to go in our carry-on bag rather than being consigned to the hold where there is a greater risk of it being damaged, misrouted, lost, or stolen. So we thought it would be helpful to tabulate what various different airlines allow you to carry on.

Please note that the precise details of what you're allowed to take into the cabin can involve a lot of small print. For example some airlines allow you to take carry on a bag of duty-free purchases in addition to your allowance; others insist that any duty-free shopping must be packed into the bag you carry on. Some allow items such as books or newspapers, an umbrella, and food purchased in the airport in addition to your allowance; some don't. So it's a good idea always check the small print on the airline's website. But this guide should get you started.

We'll try to keep this guide up to date. If you spot any errors, or updates, do please let us know. And if there's an airline you think it would be useful to add to this list, again do please let us know.


AIRLINEDimensions
(cm)
Weight
(kg)
Notes
Aer Lingus55 x 40 x 2410Plus one small handbag, laptop, duty free or baby changing bag 33x25x20
Air Canada55 x 40 x 2310Plus one personal article 43x33x16, 10kg; plus small handbag 30x25x14
Air China55 x 40 x 205Just one item
Air France55 x 35 x 2512Plus one handbag, briefcase, camera or laptop, within same weight limit
Air India55 x 35 x 258Plus lady's hand bag or laptop; only 55x35x20 on ATR and CRJ aircraft
Air New Zealand56 x 36 x 237Other shapes allowed W+H+D<=115; plus one small personal item such as handbag or laptop
Alaska Airlines61 x 43 x 25not specifiedPlus one personal item such as handbag, briefcase, laptop; must fit under seat
Alitalia55 x 35 x 258Plus one briefcase, laptop or handbag
American Airlines56 x 36 x 23not specifiedPlus one smaller personal item, must fit under seat
Aurigny Air Services48 x 36 x 2010One item only; limit 6kg on some routes
Austrian Airlines55 x 40 x 238Plus one personal item 40x30x10, e.g. lady's handbag, laptop bag or shoulder-strapped bag
Blue Islands55 x 35 x 2010Plus one additional smaller item such as laptop or handbag, must fit under seat
British Airways56 x 45 x 2523Plus one personal bag 40x30x15 (45x36x20 on Brazil flights), must fit under seat
Cathay Pacific56 x 36 x 237Plus one one small handbag, small backpack or laptop bag, 40x30x15, must fit under seat
China Eastern56 x 36 x 235Just one item
China Southern56 x 36 x 235Just one item; other shapes allowed with W+H+D<=115
Comair56 x 36 x 237Plus one personal bag 45x36x20
Delta Air Lines56 x 35 x 23no limitMax 7-10kg on some Asian routes. Plus one item such as handbag, briefcase, camera bag, laptop
Easyjet56 x 45 x 25no limitMust be able to lift into overhead locker. Plus one small handbag or laptop bag 45x36x20 for an extra fee
Egyptair56 x 45 x 258Egyptair don't specify size; dimensions here are UK CAA maximum
El Al56 x 45 x 258Just one item; must comply with W+H+D<=115
Emirates55 x 38 x 207Just one item; if boarding in India only, can be larger up to W+H+D<=115
Etihad50 x 40 x 257Just one item
Eurowings55 x 40 x 238Just one item
Finnair56 x 45 x 258Plus a small handbag or laptop bag 40x30x15, must fit under seat
Flybe55 x 35 x 2010Plus one additional smaller item such as laptop or handbag, must fit under seat
Iberia56 x 45 x 25no limitMust be able to lift into overhead locker. Plus a handbag or small briefcase, and a laptop computer or camera.
Icelandair55 x 40 x 2010Plus one small personal item, such as small hand bag or laptop
Japan Airlines55 x 45 x 2510Other shapes allowed W+H+D<=115; Plus one personal belonging, such as a handbag
Jet Airways55 x 35 x 257Allowances can be less on India internal flights
Jetblue56 x 36 x 23not specifiedPlus one personal item such as handbag, briefcase, laptop 43x33x20
Kenya Airways55 x 35 x 2512Plus one handbag, briefcase, laptop, camera bag etc within overall weight limit
KLM55 x 35 x 2512Plus one handbag, briefcase, camera or laptop, max 40x30x15, within same weight limit
Korean Air55 x 40 x 2012Other shapes allowed W+H+D<=115; plus one handbag, laptop or briefcase within weight limit
LATAM55 x 35 x 258Max 5kg on Brazil internal flights
Loganair40 x 35 x 186Just one item
Lufthansa55 x 40 x 238Plus one small bag 40x30x10 e.g. handbag, laptop bag
Malaysia Airlines56 x 36 x 237Plus briefcase, laptop or camera bag max 4kg; plus handbag
Monarch56 x 40 x 2510Or two bags within the same overall dimensions and weight limit
Norwegian55 x 40 x 2310Max 8kg to/from Dubai. Plus one small personal item 33x25x20 e.g. small handbag or laptop case
Qantas56 x 36 x 237Plus one small personal item such as a handbag, laptop, small camera
Qatar Airways50 x 37 x 257Plus one personal item such as ladies handbag or one small briefcase
Ryanair55 x 40 x 2010Plus one small bag 35x20x20
Scandinavian Airlines (SAS)55 x 40 x 238Plus a small handbag or laptop bag
Singapore Airlines56 x 36 x 237Other shapes allowed with W+H+D<=115; plus one handbag, laptop or camera bag 40x30x10
South African Airways56 x 36 x 238Plus one small personal item e.g. small handbag, small laptop case
Southwest Airlines61 x 40 x 25not specifiedPlus one small personal item such as briefcase, handbag, laptop
Stobart Air (Flybe)49 x 37 x 227Just one item
Stobart Air (Aer Lingus Regional)48 x 33 x 207Just one item
Sun-Air45 x 36 x 206Just one item
Swissair55 x 40 x 238Plus one handbag, laptop bag or shoulder bag 40x30x10
Thai Airways56 x 45 x 257Plus handbag, laptop etc W+H+D<=75, max 1.5kg
Thomas Cook Airlines55 x 40 x 206Plus one laptop, handbag or small bag
Thomson Airways55 x 40 x 205Just one item
TUI Fly55 x 40 x 206Plus one notebook
Turkish Airlines55 x 40 x 238Plus one handbag or laptop
United Airlines56 x 35 x 22not specifiedPlus one personal item such as a shoulder bag, backpack, laptop bag 43x25x22
United Express56 x 35 x 22not specifiedItems close to size limit might not fit on some flights; no further details available
Virgin Atlantic56 x 36 x 2310Plus one handbag, or small backpack/rucksack
Vueling55 x 40 x 2010Plus one additional item of significantly smaller size
WestJet53 x 38 x 23no limitPlus one personal item 41x33x15 e.g. briefcase, camera, laptop

Update log:
19th September 2016 - First publication.
19th September 2016 - American airlines' usage of 'purse' changed to 'handbag' to improve clarity for British readers.
19th September 2016 - Aurigny Air Services added.
20th September 2016 - EasyJet clarified from 'not specified' to 'no limit'.
21st September 2016 - Delta Air Lines and Iberia clarified from 'not specified' to 'no limit'.
5th October 2016 - WestJet added.
6th March 2017 - El Al added.
13th January 2018 - British Airways corrected - allowances for Brazil flights and non-Brazil flights had been the wrong way round.

Friday, March 06, 2015

Photographing the 2015 solar eclipse

Two weeks from today, on Friday 20th March 2015, the UK will experience its biggest solar eclipse since 1999. There won't be another one as good as this here until August 2026. So let's think about photographing it!

90% partial eclipse. Photo by Fred Espenak (NASA GSFC)


What's happening, when, where?


This table shows when the eclipse is happening, and how much of the sun will be eclipsed at maximum, at a number of location around the UK. You'll see that, the further north and west you go, the better the eclipse. Unfortunately, nowhere in the UK will experience totality. For that, you'd need to go to the Faroes or Svalbard.

Eclipse predictions by Fred Espenak and Chris O'Byrne (NASA GSFC)

You can get predictions for any location you like on NASA's incredible eclipse website, here:
http://eclipse.gsfc.nasa.gov/JSEX/JSEX-index.html

What kind of lens do you need?


In short - a big one. The biggest one you can lay your hands on, and then a bit bigger.  The sun is so bright, it's easy to overlook the fact that it's actually quite small.  Here's a simulation of what you can expect with various lenses of different focal lengths.


How do you photograph the sun?


You need a very, VERY dark neutral density (ND) filter. NEVER look directly at the sun through a camera lens. Remember, the sun might be 90% eclipsed, but the bits that aren't eclipsed are just as bright as usual, and that can really damage your eyes.

Trouble is, the terminology used to describe filters can be confusing, and manufacturers and retailers aren't consistent. There are three different ways of describing the strength of a filter which are in common use:

  • The multiplier for the exposure
  • The number of stops effect on the exposure (every stop is a doubling)
  • The multiplier for the exposure expressed as a power of 10.

So for example a "3x" filter could mean that it makes your exposure 3 times as long, or it could mean that it increases your exposure by 3 stops (8 times as long). Similarly, a filter described as "ND3" could increase your exposure by 3 stops (8 times as long) or by a factor of 10^3 (1000 times as long).

Here's a quick reference, based on these three different scales:


It's VITAL to understand what any given filter is actually doing, before you put it between your eye and the sun. If in doubt, ask and ask again. If still in doubt, don't do it.

But anyway, now we understand what filters do, how strong a filter do we need?

In general, you probably want 12 stops or better. The gold standard for specialist solar filters is Baader Astrosolar safety film - http://astrosolar.com/en/ - and they make it in two flavours. ND3.8 (12.6 stops) is designed for photography, and ND5.0 (16.6 stops) is recommended for visual observation. If you put a 10-stop filter, or a filter made of ND3.8 film, on the front of the lens and look through the camera wearing dark glasses, you'll probably be OK - but don't blame me if it ends in tears.

You can buy strong ND filters, but they're quire expensive. For example a 10-stop screw-in filter, in the commonly used 77mm size, costs around £80-£120. If you have a square filter holder, a 10-stop square filter costs about the same. Alternatively you can buy Baader film for about £20 per sheet and make your own filter - there are plenty of instructions out there on the internet.  Or some people would even advocate using welder's glass, which is very cheap, and can be very dark - but if you do, make sure you test its strength first.

Apart from getting the right lens and the right filter, photographing the eclipse is going to be quite easy. You won't need a tripod - unless your lens is too heavy to hand hold! - because, even with a strong filter, you'll be getting very fast shutter speeds. For example, the other day I did some tests with a 13-stop filter. I was getting 1/2000th at f/16, 100 ISO.  So that's comfortably within the range of any DSLR. All you need to do is dial in a suitable aperture and/or shutter speed, focus your lens on infinity, set the camera to spot metering, point, shoot, and repeat as desired. If your filter imparts a colour cast, it's easy to fix it in Lightroom or Photoshop afterwards. Job done.

Let's do it!

Friday, January 02, 2015

2014 in numbers at LFH

2,959
new customers acquired

4,478
customers served

6,616
orders fulfilled

8,577
items of equipment hired

£12.45 million
value of equipment hired


Most popular products:

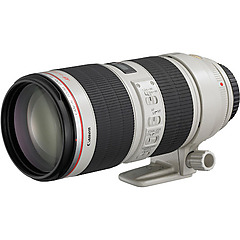
1st ... Canon EF 70-200mm f/2.8 L IS II USM  (2013: 2nd)

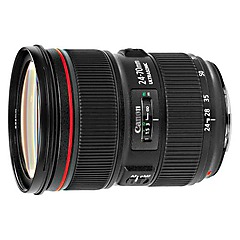
2nd ... Canon EF 24-70mm f/2.8 L II USM (2013: 3rd)

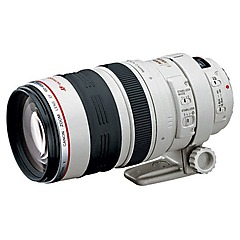
3rd ... Canon EF 100-400mm f/4.5-5.6 L IS USM (2013: 1st)

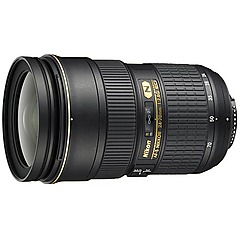
4th ... Nikon AF-S 24-70mm f/2.8 G ED (2013: 5th)

5th ... Canon EF 16-35mm f/2.8 L II USM (2013: 4th)


Thursday, January 01, 2015

Northern Lights part 3 - personal experience and conclusions

If you tuned in for parts 1 and 2 of this feature, you'll be totally up to speed with the high-ISO capabilities of your camera, and you'll have seen that in the right conditions you can get good photos of the aurora with nothing more than consumer-level DSLR equipment. If you missed them, part 1 is here and part 2 is here.

In part 3 we'll look at what can happen when the conditions aren't right - something I have experience of, unfortunately - and use this to work out what kind of equipment gives you the best chances of getting some good photos.

Iceland, December 2012

On my short trip to Iceland in 2012, we only had one night with clear skies (and no moon), but the aurora didn't show. At least, not to the naked eye. If you looked out of the corner of your eye towards the northern horizon there was a sort of glittery cloudy feel to it, but if you looked straight at it there was nothing. However, the camera proved that there was something there. This was taken using a Canon 5D (Mk I), f=18mm, ISO 3200, 30 seconds at f/2.8.


At ISO 1600 and f/4 - the limits we're assuming for consumer-grade equipment, remember - the exposure time would have had to be 2 minutes!! But that really is a sort of worst possible case. In those circumstances I'd have been quite happy to leave the camera to take a 2-minute exposure if that was the only chance I had to get something. I'd probably have taken a load of shots and overlaid them to get some star trailing, or something like that. In these dire sorts of conditions, I think your results are limited more by your imagination and your determination than by your equipment.

Norway, March 2014

In early 2014 I went to Tromsø in Norway and again the conditions weren't good. We had one night when things looked promising, but then it clouded over just as the aurora was starting to show; and we had one night when the skies eventually cleared, and we saw an aurora, but it wasn't great.

This is from the first night: Canon 6D, f=15mm, ISO 3200, 2 seconds at f/2.8. At ISO 1600 and f/4 it would have been 8 seconds, which I think would have been workable.  But you'll note that the overall illumination of the scene benefits from those clouds, which are reflecting light from some villages a couple of miles away. Without the clouds, I'd have had to use a longer exposure time or tolerate the landscape being dark and underexposed.


And these are from the second night. Both shots are with the Canon 6D, f=15mm. The first was ISO 3200, 20 seconds at f/2.8; the selfie was at ISO 5000(!!!), 15 seconds at f/2.8, and even then we had a bit of accidental help when somebody in the car park behind the camera switched on their car headlights At ISO 1600 and f/4 the exposure times would have had to be 80 seconds and about 90 seconds, which I don't think would have been workable. Certainly not for the selfie!


Observations regarding focal length

You'll have noted that all my photos were taken with ultra wide lenses with focal lengths of 15mm to 18mm on full-frame (FX) DSLRs. That's the equivalent of about 10mm on crop-sensor (DX) cameras. My personal favourite is the Canon 15mm f/2.8 fisheye, which is sadly no longer manufactured but is a super lens for the Northern Lights. (The Nikon equivalent is the Nikon 16mm f/2.8 fisheye. There are also 10mm fisheyes available for crop-sensor DSLRs.)

Could you get away with a less wide lens? Yes, you could. For example I've illustrated below how these four photos could be cropped to stimulate what you'd get with a 24mm lens (15-16mm on DX). I think they're still quite acceptable from a compositional point of view. Acceptable, but I think definitely not ideal. Until I saw a half-decent aurora in Tromsø I really had no appreciation of how much of the sky they could occupy.


 Interestingly, a 24mm focal length also allows you to use an f/1.4 lens. (For example, the Canon EF 24mm f/1.4 L II USM or the Nikon AF-S 24mm f/1.4 G ED.) I've got to admit that I'm really not sure how valuable this would be, though. On the one hand, 24mm really isn't very wide at all unless you're using a full-frame (FX) DSLR, and they can usually cope at high enough ISOs that you perhaps don't really need f/1.4. On the other hand, f/1.4 is brilliantly fast and it might well come in handy - especially if you want to keep the ISO down in order to make a big print. (Remember how the ISO capability of your camera depends on what you want to do with the image?) I guess at the end of the day having a 24mm f/1.4 lens in your bag gives you options that you wouldn't have otherwise, and that can't be a bad thing.

Conclusions and recommendations

You'll have noticed that there was a sort of common theme to my aurora photos. In the three new-moon cloudless-sky faint-aurora photos, I've relied on the fact that I could shoot at ISO 3200 or above, and that I've had an f/2.8 lens. If I had been limited to ISO 1600 and f/4 - our notional consumer-grade equipment - the exposure times for these three photos would have been in the range of 80 to 120 seconds. That's not good.

So, what have we learned?
  • You want a really wide angle lens. Fast is good but wide is essential. My four pictures here were taken with focal lengths of 15-18mm. (On a crop-sensor DSLR that's 10-12mm.) 
  • If you have moonlight and a bright aurora, you'll be fine with a consumer-grade DSLR and a wide-angle lens. But if you don't ... you might not be.
If you don't already own a full-frame camera and an ultra-wide full-frame lens, I'm not going to say that you should buy or hire one for your Northern Lights trip, for two reasons. Firstly, one very important consideration is that operating a camera in the dark really isn't easy, and you need to know your way around the controls. It could be that you'd be happier with a camera that you know well, rather than one which is theoretically superior but unfamiliar. Or perhaps not. It depends what sort of person you are, I guess, and how easily you pick these sorts of things up. And secondly, because you might not need it. If you get a good light show and good moonlight, you can get decent results with a lower-spec camera and lens. Or if it's cloudy every night, it doesn't matter what camera you've got!

But it's clear, I think, that there are definitely some conditions in which consumer-grade kit would struggle, and something like a Canon 6D / Nikon D600 (or better!) and an f/2.8 lens would cope better. At the end of the day it's for you to decide how likely you think that is, how important it is to you, and whether it's worth the money.

Wednesday, December 24, 2014

Northern Lights part 2 - Some practical considerations


If you tuned in for part 1 of this feature, you'll appreciate that it's important to understand how high you can push the ISO of your camera. Hopefully you'll have tested your camera to see how it performs. If you missed it, part 1 is here.

So, now you know what your camera can do. How are you going to take advantage of that? What's it actually like photographing the Northern Lights?

Well, before we talk about anything else, the first thing to remember is that it's probably going to be COLD. You can look at the temperature records for popular gateway destinations like Tromsø and Reykjavik and the Lofotens (WeatherSpark is a great source) and see that they have average overnight temperatures in the winter of around -5°C to -10°C. But on any given night it can be much colder. And if you venture inland, away from the coast, it can be an awful lot colder. As I'm writing this, it's -32°C in northern Finland, only about 100km from Tromsø. Of course, as they say in Finland there's no such thing as bad weather, just bad clothing. So make sure you look after your vulnerable extremities, and make sure you look after your camera batteries and keep them inside your clothing whenever possible. The cold can kill them very quickly.

Apart from being cold, it's also usually quite DARK. (During the winter season, hardly a week goes by here at LensesForHire without a customer conversation along the lines of "Northern Lights ... tripod ... dark ... tripped over ... smashed.") That's why you've tested the high-ISO capability of your camera - you have, haven't you? - but even so you'll want to be shooting with as wide an aperture as you can manage. And you'll want your lens to be wide too - auroral displays often take up a very large part of the sky. Most guides to photographing the Northern Lights will tell you that you need a wide and fast lens, but they don't often help you choose between wide-and-very-fast (e.g. 24mm f/1.4) or fast-and-very-wide (e.g. 16mm f/2.8). This one will. Bear with us.

We'll see some practical illustrations in part 3 of this series, but the short version for now is that in part it depends on your camera. If you have a very modern DSLR which can happily shoot at very high ISO values, then you don't have to worry so much about "fast" and you can concentrate on "wide". With an older DSLR that's more challenged at high ISO levels, "fast" is more important. So what we'll do for the purposes of this exercise is assume you have a typical consumer DSLR setup - a camera that can cope well up to ISO 1600, and an f/4 wide angle lens - and see how you get on with that.

Anyway, it's dark. How dark? Well, that depends on whether or not the moon is out. (You can check moonrise and moonset times, and a whole lot more besides, using The Photographer's Ephemeris.)

Let's look first at the situation where the moon is out. The landscape will be illuminated by moonlight, and that pretty much defines your exposure for you.  You have to set the exposure to expose correctly for the landscape, and that's that. (A photo of the aurora with no land in it wouldn't be very satisfying. Too abstract, and no sense of scale.)

You probably know the Sunny 16 rule: in bright sunlight, at f/16, the correct exposure is the reciprocal of the ISO setting. So 1/100th of a second at ISO 100, 1/400th at ISO 400, and so on. Obviously you can use this to calculate the correct exposure time for any combination of ISO and aperture. For example let's look at your assumed limiting conditions of ISO 1600 and f/4. ISO 1600 is 4 stops more exposure than ISO 100, and f/4 is 4 stops more exposure than f/16, so you'd need your shutter speed to be 8 stops faster than 1/100th, which would be ... something which no regular camera can achieve. Obviously. Shooting at ISO 1600 and f/4 in bright sunlight would be madness.

But moonlight from the full moon is about 17-18 stops fainter than sunlight. (Reference.) Plus, I think a moonlight photo would want to be underexposed by a stop or two - you want it to look like moonlight, nor sunlight. So at ISO 1600 and f/4, you're looking at shutter speeds which are 7-9 stops more exposure than 1/100th, which is around 1½-5 seconds. That's quite workable, I would suggest.  With an ultra-wide lens, your stars will still be points of light (i.e. no visible trailing) as long as your exposure is less than 20-30 seconds. (Reference.) And if the aurora is moving, it shouldn't move too much in that sort of time.

So that's an important result.  If the moon is out, you should be fine with consumer-grade DSLR equipment like we've assumed. What you'll see by way of aurora in your photos depends, of course, on how bright it is relative to the landscape. If it's bright enough, you'll get good images.  If it's less bright, your best bet is probably to take composite images, one for the landscape and one for the sky with different exposures, and merge them later.

But around new moon the illumination is much harder to quantify - starlight, aurora, street lights or village lights perhaps, clouds, light from the moon or sun below the horizon scattered by the atmosphere, and so on. Determining the correct exposure is much more difficult and tends to be much more trial-and-error. We'll look at that, and look at some specific equipment recommendations, in part 3.

Tuesday, December 09, 2014

Northern Lights part 1 - Testing the high ISO capability of your camera

At this time of year lots of our clients are off in search of the Northern Lights, and that can be a demanding challenge for both your camera and your lens. It's not like taking photos in daylight, and you're often faced with having to make difficult trade-offs between aperture, shutter speed and ISO. You aperture is of course limited by your lens; you don't want the shutter speed to be too long, so that you can capture the movement of the aurora; but you don't want the ISO to be too high, in case your images are too noisy.

The difficult part of this is sometimes the ISO. How many of us know how high we can push the ISO setting on our cameras before the images start to become degraded? It's not something you can just look up on the internet, for two reasons. Firstly different people have different standards when it comes to the acceptability of noise. And secondly - as we'll see in a minute - it depends on the size at which you're viewing your photos. But fortunately it's not too hard to test for yourself.

The basic idea is that we choose a test scene and photograph it repeatedly using different ISO settings. Ideally the scene should contain a range of colours and a range of dark and light tones. You'll need to set up the camera on a tripod to ensure that each shot is framed the same. And you'll need it to be indoors, because shooting at high ISO values in sunlight is difficult - it often needs a faster shutter speed than your camera can manage.

Something like this, perhaps.


Set the camera to aperture priority, and set the lens to a middling aperture like f/5.6 or f/8 where it's going to perform well. (This test isn't about the lens.) You may as well set the camera to produce JPEGs rather than RAWs because it's quicker and we don't need to do any clever processing. And it doesn't really matter whether you have in-camera noise reduction set to on or off, but remember that your results only apply to that one situation. (You might want to try the test twice, with noise reduction on and off.)

And the procedure is really simple. Set the ISO to 100 and take the shot. Set the ISO to 200 and take the shot. (The exposure will be twice as fast, obviously.) Set the ISO to 400 and take the shot. And so on until you've reached the highest ISO value that your camera can manage.

Now all we need to do is look at the images and see where they start to get noisy. But there's an important point to remember. The closer you look at them (i.e. the higher the magnification), the more you'll see the noise.

Here's an example, using a set of images from a Canon 650D. I've cropped a section from each image from ISO 100 to ISO 6400, and put them together on this composite. This comparison is at 100% resolution - what some people call a 100% crop - because each pixel in this image corresponds to one pixel on the sensor. It looks a bit clumsy having such a big image in this blog post, but it's important to view the composite image at full size (1800 x 900 pixels) if the conclusions are going to be valid.

(Don't worry about the ISO 400 image looking a bit blurry, by the way. It looks like the tripod wasn't perfectly stable, or somebody jogged the camera. Ideally we'd have been a bit more careful. But it doesn't really matter.)


So what do we see here? Well, personally, I think that up to ISO 800 everything is fine. But there's clearly some noise at ISO 1600, and from ISO 3200 upwards it's very bad.

But, remember I said that the size at which you're viewing your photos makes a difference? This test was done at very high resolution - the full 18-megapixel image of the test scene, 5184 x 3456 pixels, would be about 4 feet / 1.3m wide at this resolution if you're reading this on a standard computer monitor. If you were to print it, you wouldn't be able to see all this detail unless you printed at A3 or larger. Most of the time, most of us don't do that.

So what happens if the image is smaller? In simple terms, the noise is reduced. Making an image smaller involves combining several pixels into one pixel, and in that process all the random noise gets averaged out.

Here's another comparison of the images taken at different ISO settings, but this time it's presented at 50% resolution. I've scaled the full test image to 50% of its original size - from 5184x3456 to 2592x1728 pixels - and then extracted the crops.


At this resolution, the full image would be about 27"x17" on a standard resolution monitor, and that isn't massively more than the kinds of monitors some of us use these days with desktop machines. You could theoretically see the individual pixels if you were to print it at 9"x6" or larger. To my eye, averaging out the noise by reducing the size of the image seems to have helped. ISO 6400 is still dreadful and ISO 3200 is still bad, but ISO 1600 isn't looking so bad.

And finally, here's a third comparison which is based on an even greater reduction in image size. This one is at 20% resolution. I've scaled the full test image to 20% of its original size - from 5184x3456 to 1037x691 pixels - and then extracted the crops. So each pixel here is constructed from a 5x5 block of pixels in the original image, and we might expect that the averaging process has done quite a lot to the noise levels.


This is more like the kind of resolution you'd use for displaying the image on the internet. To my eyes, ISO 1600 is quite acceptable at this resolution, and ISO 3200 certainly isn't too bad, though ISO 6400 is still pretty ropey.

So all in all, that gives us quit an interesting set of results:

  • you can use ISO values up to 800 without any concerns;
  • for large prints, ISO 800 is fine but ISO 1600 is questionable;
  • for small prints, or for full-screen display on a large monitor, ISO 1600 is probably acceptable;
  • for use on websites etc ISO 1600 is fine and even ISO 3200 is reasonably OK;
  • but ISO 6400 should be avoided unless you're desperate.
Remember, this is based on MY assessment as to what is or is not acceptable: you may have different standards. But you'd still get a similar pattern with graduations in it depending on the intended use of the images.

And remember also, that this is based on a Canon 650D with no in-camera noise reduction. If you'd like to know how your camera compares ... what's stopping you?

Wednesday, July 30, 2014

Smashing fun with filters

One of our customers recently had a bit of a mishap with a protective filter. She dropped it when she took it off to clean it:

Ouch!

Obviously you wouldn't want to put that back on the front of the lens.  But it led us to wonder what would happen if you did.  So we tried it.  In case you're interested, the lens was a Canon EF 85mm f/1.2 L II USM (we're glad she didn't drop that!!) and the camera we used was a Canon EOS 5D Mark III.  All the images below are JPEGs straight out of the camera on its default settings, with no additional processing.


Firstly, with the lens stopped down to f/10, which is about the smallest aperture most people will be using most of the time.  This is without the filter:


... and this is with the broken filter in place:


You might be  surprised by how little difference there is.  The second photo has noticeably reduced colour saturation and contrast, and that particularly affects the specular highlights on the metallic objects, but that's the main difference. The second photo also looks a little bit less sharp, but we reckon that's largely an effect of the reduced contrast. To show that, we can look at a couple of crops from the centres of the images. Firstly without the filter:


and then with the broken filter:


You can see that, despite the reduced contrast, there's still plenty of detail in the photo taken with the filter. (Remember, if you're viewing this on a standard desktop monitor, the full image would be about 4-5 feet across at this magnification!)  We reckon that, if you were to boost the contrast on the with-filter photo, and sharpen them both judiciously, you'd really struggle to tell them apart.


And then we tried the same thing with the lens wide open at f/1.2. This is taken without the filter:


and this is taken with the broken filter in place:


Again, the main difference is a loss of contrast. The shallow depth of field pretty much masks all other effects.  (Plus, the shallow depth of field makes the comparison a little bit more difficult: if you look closely at the tool kit you'll see that the second photo is focussed slightly further back than the first one. You wouldn't spot that at f/10.)


Wow. Remember, this is the filter which we used:


Some people are very sniffy about using protective filters because they degrade the image quality. Well, yes, they do.  In some other applications - for example if you're shooting into the light, or shooting at night with lots of bright point sources of light - they can have a significant effect.  But this little experiment demonstrates that, for most photography with "ordinary" subjects and "ordinary" lighting, even a totally smashed filter has surprisingly little effect. An undamaged filter would obviously have even less effect.  And dust on the front of the lens ... don't worry about it!

Tuesday, April 01, 2014

Some extreme equipment on our current shopping list


When we exhibited at The Photography Show at the beginning of March, we were quite surprised at the number of people who were asking us about various equipment which we don't currently stock. It was clear that there is an appetite out there for people to hire photographic equipment which might be regarded as "extreme". Obviously we want to be able to keep our customers happy. So we've put our heads together and come up with this shopping lost. We're looking into financing issues and we hope to be able to make the majority of the items described below available for you to hire within the near future.

Do please let us know if you have a particular interest in any of these, or indeed if there's something you'd like to hire but which you think we might have omitted from consideration.


Sigma APO 200-500mm f/2.8 EX DG

Comes complete with a dedicated 2x teleconverter to give you 400-1000mm f/5.6.

Length: 726mm
Diameter: 236mm
Weight: 15.7kg

Availability: Good. Widely available from good photographic retailers.
Purchase price: £13,000 (New)

Estimated hire price: £600/week


Nikon AF-S 800mm f/5.6E FL ED VR

Comes complete with a dedicated 1.25x teleconverter to give you 1000mm f/7.

Length: 469mm
Diameter: 160mm
Weight: 4.6kg

Availability: Good. Widely available from good photographic retailers.
Purchase price: £14,000 (New)

Estimated hire price: £600/week


Canon TV 5200mm f/14 mirror lens

The biggest lens ever designed for SLR use. (There's an SLR attached to it in this picture!)

Length: 1890mm
Diameter: 600mm
Weight: 100kg without stand

Availability: Very restricted. We believe that only 3 were ever made and we haven't seen one for sale for several years.
Purchase price: US$55,000 (Used, eBay, 2008)

Estimated hire price: £1,500/week


Nikon Ai 1200-1700mm f/5.6-8 P ED IF

Probably the world's longest ever zoom lens.

Length: 888mm
Diameter: 237mm
Weight: 16kg

Availability: Restricted. Only 15 units were manufactured in 1988-98 and we haven't seen one for sale for quite a while.
Purchase price: US$75,000 (New, Nikon, 1990)

Estimated hire price: £1,800/week


Nikon 2000mm f/11 C Reflex

We believe this is the biggest lens Nikon have ever made.

Length: 598mm
Diameter: 262mm
Weight: 7.5kg

Availability: Moderate. Approximately 300 units were manufactured in 1971-77.
Purchase price: €66,000 (Mint-, auction, 2011)

Estimated hire price: £2,400/week


Canon EF 1200mm f/5.6 L USM

A legendary lens but not Canon's biggest ever (see above).

Length: 836mm
Diameter: 228mm
Weight: 16.5kg

Availability: Uncertain. Total production in 1993-2005 is rumoured to be less than 20 units. But B&H in New York have sold two in recent years.
Purchase price: US$120,000 (Used, B&H, 2009)

Estimated hire price: £3,000/week


Nikon Ai 6mm f/2.8 fisheye

Probably the widest fisheye lens ever made, with an amazing angle of view of 220°.

Length: 171mm
Diameter: 236mm
Weight: 5.2kg

Availability: Reasonable. Approximately 1000 units manufactured, 1972-98.
Purchase price: £100,000 (Mint-, Grays of Westminster, 2013)

Estimated hire price: £4,000/week


Leica APO-Telyt-R 1600mm f/5.6

A unique lens, specially commissioned by Sheikh Saud Bin Mohammed Al-Thani of Qatar.

Length: 1200mm
Diameter: 420mm
Weight: 60kg

Availability: Difficult. There's only one and the owner certainly doesn't need to sell. But he might be getting bored with it by now.
Purchase price: HK$16,000,000 (New, Leica, 2012)

Estimated hire price: £50,000/week


Zeiss APO Sonar T* 1700mm f/4

A unique lens, specially commissioned by an anonymous client. Designed for medium format use: the picture shows it attached to a Hasselblad.

Length: not documented
Diameter: not documented
Weight: 256kg

Availability: Difficult. There's only one and the owner presumably doesn't need to sell. But he might be getting bored with it by now.
Purchase price: >€2,000,000 rumoured (Zeiss, 2006)

Estimated hire price: £50,000/week TBC


Lockheed KH-11 Kennan 57600mm f/24

Similar to the Hubble telescope, but designed to point downwards.

Length: 13.2m
Diameter: 2.4m
Weight: 11.1 tonnes in launch configuration

Availability: Hopeful. NASA have two, built as spares but unused. Storage is costing a fortune and we hope they may be amenable to an offer.
Purchase price: Classified.

Estimated hire price: £60,000,000/week plus launch costs. Please note that enhanced background checks would be required for any client wishing to hire this item.

Thursday, December 12, 2013

The sunrise challenge

Here's a fun project which you you might like to try.  It can be very addictive.

The challenge is to capture the sunrise, sunset, moonrise or moonset over a famous landmark, with a nice big sun/moon alongside the landmark.  For example here's the sun rising over Windsor Castle on Thursday 5th December 2013:


What do you need to do this? Not much really:

  • A camera and a tripod.
  • A big lens.  (We know where you can get one of them!)  The photo above was taken with a Canon 500mm f/4 on a Canon 40D.
  • A copy of The Photographer's Ephemeris ("TPE"). This brilliant software is available as a FREE download for Windows/Apple desktops, and an inexpensive app for iOS/Android, here.
  • Imagination and patience.
  • A decent weather forecast and a bit of luck.

Researching the location


The first thing to do is to work out how far away you need to be. To do this, you need to visualise how big you want the sun/moon to be alongside your chosen landmark. In this case, I thought getting the sun to be about 1/3rd as big as the castle would provide a nice composition. Windsor Castle is about 300 metres long, so I'd want the sun to look as big as a 100-metre object would be if it was at the castle. With me so far? Now in reality the sun and moon are roughly 120 times as far away as they are big, so I'd need to take the photo from a range of 120 times 100 metres, which is 12 km. Roughly. This isn't an exact science.

Having decided on the range, the next task is to find a suitable location at roughly the correct range, from which you can see your landmark on the horizon. Google Maps is your friend here, and a bit of local knowledge does't hurt. If you don't know the location but you suspect it might be suitable, you can often find images on the internet which will help you decide without the need for a site visit. (We'll see an example of that later.)

When you're thinking about locations, you need to bear in mind the direction in which the sun/moon will rise and set.  This varies from day to day, and there's a little bit more variation in the north of the UK than in the south.  Sun/moon rise is at a compass bearing between about 050° and 130° (from north-east to south-east, roughly); sun/moon set is at a compass bearing between about 230° and 310° (from south-west to north-west, roughly).  So there's no point looking for locations which are too close to due north or south from your target.

Researching the opportunity


The Photographer's Ephemeris will show you the direction and time of sun/moon rise/set from any location on any date.  It's amazingly easy to use.  Here's an example.  I know a good spot in Cookham Dean from where Windsor Castle is visible across the fields in the distance to the south-east.  Measuring it on Google Maps showed that it is about 12km away, which is just what I wanted.  TPE showed that, from this location, the sun rises directly over the castle (on a compass bearing of 126.5°) in early December and again in early January.  Here's a screen shot from TPE showing the sunrise on 5th December (I've added the inset for clarity):


Here's where you might need a bit of patience.  Sunrise and sunset drift around the compass over the course of a year: in the north-east and north-west at midsummer, in the east and west at the equinoxes, and in the south-east and south-west in midwinter.  So you might have to wait several months before your opportunity arises.  The patterns of moonrise and moonset are harder to describe and the best thing to do is experiment with TPE.

For the Windsor Castle shot, the ideal date to see the sun rise directly behind the castle would have been around Tuesday 3rd December. But the weather was consistently rubbish that week, and the first time we had decently clear skies in the morning was Thursday 5th.  If the weather hadn't played ball at all, the next window of opportunity would be around 4th-11th January; and after that, the next opportunity would be in December next year!  Like I said, you might need a bit of patience.

How big a lens?


I've blogged about this sort of thing before: see "How big a lens do I need?"

In general, the sun/moon will fill the frame of your camera if your full-frame equivalent focal length is about 2400mm.  Obviously you don't need or want to fill the frame with the sun/moon though: it tends to restrict the compositional possibilities.  You can see from the first picture above that a focal length of 500mm on a crop-sensor DSLR, which is about 800mm in full-frame equivalent terms, gives a reasonable result.  But that's pretty much the minimum, I think.  A bit longer lens probably wouldn't hurt.

Our suggestions for lenses for this sort of project would be along the following lines:

  • Full-frame camera: 800mm lens (maybe with extender /teleconverter), 600mm lens with extender/teleconverter, 500mm lens with extender/teleconverter
  • Crop-sensor camera: 600mm lens, 500mm lens (maybe with extender/teleconverter), 400mm lens with extender/teleconverter

You can see all the long lenses which we stock here.

Getting the shot


Arrive on site. Set up camera and lens on tripod. Point towards chosen landmark. Wait.  Press shutter button.

It's almost that easy. Getting the exposure right can be a bit tricky, so bracketing is probably a good idea.  You might also want to think about shooting a timelapse, if you have an interval timer.  But it's really not hard.

It's also worth remembering that, if it's the sun rather than the moon you're chasing, the best colours in the sky are before sunrise and after sunset. If you've brought a wide-angle lens with you as well - and it would be a waste not to - then you should aim to arrive on site half an hour before sunrise, or stay on site until half an hour after sunset.

Enjoying the results of your efforts


To whet your appetite, here are a few more pictures from the Windsor castle session on 5th December.  Sunrise on that date was going to be at 07:52, according to TPE.  I was on site around 07:30.

07:43 - Waiting for the sun to rise

07:44 - 180° panoramic view of the sky - glad I brought the wide-angle lens!

07:45 - Sky brightening over the castle

07:49 - Sky is still beautiful
 
07:51:40 - First glimpse of the sun.

07:53 - The sun is half way above the horizon now and already the colours in the sky
are beginning to wash out. Show over, time to go home and thaw out.


Another potential opportunity


Remember I said earlier that you could research potential locations on the internet? Well, here's an example.

I think it would be fun to catch the moon rising or setting over the skyscrapers at Canary Wharf, especially if we can time it when the lights are all on and there'a a little bit of light in the sky.

A bit of research on Google Maps and TPE suggests that Shooters Hill in Greenwich might be a suitable site. From there, Canary Wharf is about 7km away on a bearing of roughly 300°.  It's very easy to find photos on the internet which confirm that the skyscrapers in Canary Wharf are visible from there.  It's south-east of Canary Wharf, so we'll be looking for the moon setting rather than rising. And TPE shows that this will be happening in only a few days time!  Here's a screen shot for Sunday 15th December:


The only snag is that on that date the moon will be setting at 05:51. Hmm.  Maybe a couple of days later would be better: on Tuesday 17th the moon sets in virtually the same position, at a much more civilised time of 07:37, and it's a full moon too.

Maybe I'll see you there?


Tuesday, December 10, 2013

Keeping the insurers happy

All the equipment we hire out comes, by default, with insurance which is good for up to 60 days worldwide. There's a bunch of small print in the insurance policy, as you'd expect, but the only bit that really matters, for most purposes, is this:
The Insured must take and cause to be taken all reasonable precautions to avoid injury, loss or damage; and take and cause to be taken all reasonable steps to safeguard the items insured from loss or damage.
So what is a 'reasonable precaution'?  This is starting to sound like one of the questions asked by the jury in the Vicky Pryce trial, and the obvious answer is this:
a reasonable precaution is a precaution which is reasonable
But we do have some constructive suggestions (some of which are courtesy of EOS magazine) for things you can do to minimise the chances of having a bad hire experience.
  1. Always use a neck strap with your camera. It will save the camera and lens from damage if it slips out of your hands. A camera should only fall into a river or the sea if you fall in with it!
  2. If you use a tripod, always make sure it is heavy enough to avoid being blown over by a strong gust of wind. Many tripods have hooks to which you can attach weights to make this easier.
    The tripod wasn't stable enough
  3. Never let the equipment out of your sight in a public place.
  4. Never leave your equipment in your car where it is visible.
  5. If you need to put a camera bag on the ground as you take a picture, always keep it in front of you, preferably with your foot on the strap. 
  6. If you sit at a pavement café, avoid tables next to the road. Thieves can snatch your camera and be away before you realise what is happening. Choose a table closer to the café for safety. 
  7. Remember to pick up all your camera equipment after shooting! 
  8. Do not use the boot of your car as a camera case, returning to swap lenses or accessories. If thieves are watching, they will see that you have valuable goods and clear the boot while you are away for a few minutes. 
  9. Always take cameras and lenses into a hotel if you are staying overnight. Many hotels offer safe deposit boxes for valuables, either in your room or at the reception area.
  10. Never leave valuable items in your car overnight.
  11. When using a multi-storey car park, find a space in the middle of the floor, away from pedestrian exits. Thieves prefer to target cars near to staircases where they can escape quickly if challenged. 
  12. Do not cover your camera bags with badges which shout the name of your camera. Some photographers have stopped using camera bags because they are obvious targets for thieves. A rucksack or holdall can be safer, but make sure there is enough padding to protect the camera and lenses. Use padded lens pouches (fortunately all our lenses are supplied with these!), or wrap lenses in soft cloths. 
  13. Always report any loss or theft to the local police. If you are travelling, report the loss at your next stop. Record the details of the police station, together with the name of the police officer and the police case number (if any). This information may be required when you make a claim. 
Hope this helps.  Keep safe!

Monday, August 19, 2013

Fun with filters

We fit protective filters to all our lenses which can accommodate them. Some people prefer to use them, especially on expensive hired equipment, so hopefully they'll be happy. Some people prefer not to, and that's fine. The most common reason for people not wanting to use protective filters is their concerns about what it does for image quality. So we thought we'd do some experiments.

First off, here's our man Richie with his test setup. From left to right:


Here's a close-up of the test rig. As you can see these are all decent quality Hoya Pro 1 Digital filters, not your cheap rubbish. You're looking at about £1000-worth of filters on the end of that lens.


Here's another view of the test set-up. You can see that the front filter isn't exactly in optimal condition. It's got a huge crack and it's covered with dust and fingerprints and other crap. And ALL 34 OF THEM are rejects too: cracked, chipped, scratched, indelibly marked, that sort of thing. You wouldn't want to put one of these on your lens - and we wouldn't want you to - let alone 34 of them.


This is a test shot taken at f=80mm, without any filters. We'll use this to check what effect the filters have.


And this is a test shot taken at f=400mm, without any filters.


Here's what we got when we used all 34 damaged filters at full zoom of 400mm. Hmm. The contrast and sharpness aren't quite what they were. Still, there's no sign of the cracks and scratches in all the filters.


And this was an attempt to clean up the image. We've massively boosted the contrast, clarity, saturation etc. It's much better than the straight-out-of-the-camera shot, but it's still not brilliant. Still, we think it's surprisingly good bearing in mind what was on the front of the lens!


Here's what we got using all 34 filters with the lens set to its minimum zoom of 80mm. The vignetting is a little extreme, isn't it? That's because the lens is effectively looking down a long tunnel created by the filters. At 400mm, the field of view is narrow enough that the tunnel walls don't affect the picture; but at 80mm they do.


And finally this was an attempt to salvage the best image we could from the second image. Again it's not brilliant, but again all that crap in front of the lens hasn't done as much damage as you might think.


So what have we learned?

Well, probably not much that's of practical value in the real world.

We've learned that scratched, cracks and other crap on your filter don't necessarily show up on your image. Sure, you can degrade the image in terms of contrast and sharpness by attaching a really crappy piece of glass to the front of your lens; but the defects in the glass don't show up directly.

We've also learned how to make photos look just like they're on Instagram, using just a DSLR, a £2000 lens and £1000 worth of filters.

What about if we'd only used one filter?

Some people might be wondering what difference it would make to the image if we only used one good filter, instead of 34 bad ones.  The answer is that in most situations a good filter will have no noticeable effect on your image quality.

In the real world, we can only think of about three situations where using a *good* filter is going to noticeably degrade your image:

  1. If you're shooting into the sun, a filter can make the lens flare worse.
  2. With some telephoto lenses - especially image stabilized ones, we suspect - a filter can make the bokeh (out of focus background) look more harsh.
  3. Filters can cause 'ghosting' if you have lots of bright points of light in the image, as in astrophotography or night-time city photography.