Friday, March 06, 2015

Photographing the 2015 solar eclipse

Two weeks from today, on Friday 20th March 2015, the UK will experience its biggest solar eclipse since 1999. There won't be another one as good as this here until August 2026. So let's think about photographing it!

90% partial eclipse. Photo by Fred Espenak (NASA GSFC)


What's happening, when, where?


This table shows when the eclipse is happening, and how much of the sun will be eclipsed at maximum, at a number of location around the UK. You'll see that, the further north and west you go, the better the eclipse. Unfortunately, nowhere in the UK will experience totality. For that, you'd need to go to the Faroes or Svalbard.

Eclipse predictions by Fred Espenak and Chris O'Byrne (NASA GSFC)

You can get predictions for any location you like on NASA's incredible eclipse website, here:
http://eclipse.gsfc.nasa.gov/JSEX/JSEX-index.html

What kind of lens do you need?


In short - a big one. The biggest one you can lay your hands on, and then a bit bigger.  The sun is so bright, it's easy to overlook the fact that it's actually quite small.  Here's a simulation of what you can expect with various lenses of different focal lengths.


How do you photograph the sun?


You need a very, VERY dark neutral density (ND) filter. NEVER look directly at the sun through a camera lens. Remember, the sun might be 90% eclipsed, but the bits that aren't eclipsed are just as bright as usual, and that can really damage your eyes.

Trouble is, the terminology used to describe filters can be confusing, and manufacturers and retailers aren't consistent. There are three different ways of describing the strength of a filter which are in common use:

  • The multiplier for the exposure
  • The number of stops effect on the exposure (every stop is a doubling)
  • The multiplier for the exposure expressed as a power of 10.

So for example a "3x" filter could mean that it makes your exposure 3 times as long, or it could mean that it increases your exposure by 3 stops (8 times as long). Similarly, a filter described as "ND3" could increase your exposure by 3 stops (8 times as long) or by a factor of 10^3 (1000 times as long).

Here's a quick reference, based on these three different scales:


It's VITAL to understand what any given filter is actually doing, before you put it between your eye and the sun. If in doubt, ask and ask again. If still in doubt, don't do it.

But anyway, now we understand what filters do, how strong a filter do we need?

In general, you probably want 12 stops or better. The gold standard for specialist solar filters is Baader Astrosolar safety filmhttp://astrosolar.com/en/ - and they make it in two flavours. ND3.8 (12.6 stops) is designed for photography, and ND5.0 (16.6 stops) is recommended for visual observation. If you put a 10-stop filter, or a filter made of ND3.8 film, on the front of the lens and look through the camera wearing dark glasses, you'll probably be OK - but don't blame me if it ends in tears.

You can buy strong ND filters, but they're quire expensive. For example a 10-stop screw-in filter, in the commonly used 77mm size, costs around £80-£120. If you have a square filter holder, a 10-stop square filter costs about the same. Alternatively you can buy Baader film for about £20 per sheet and make your own filter - there are plenty of instructions out there on the internet.  Or some people would even advocate using welder's glass, which is very cheap, and can be very dark - but if you do, make sure you test its strength first.

Apart from getting the right lens and the right filter, photographing the eclipse is going to be quite easy. You won't need a tripod - unless your lens is too heavy to hand hold! - because, even with a strong filter, you'll be getting very fast shutter speeds. For example, the other day I did some tests with a 13-stop filter. I was getting 1/2000th at f/16, 100 ISO.  So that's comfortably within the range of any DSLR. All you need to do is dial in a suitable aperture and/or shutter speed, focus your lens on infinity, set the camera to spot metering, point, shoot, and repeat as desired. If your filter imparts a colour cast, it's easy to fix it in Lightroom or Photoshop afterwards. Job done.

Let's do it!

Friday, January 02, 2015

2014 in numbers at LFH

2,959
new customers acquired

4,478
customers served

6,616
orders fulfilled

8,577
items of equipment hired

£12.45 million
value of equipment hired


Most popular products:

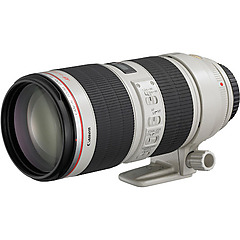
1st ... Canon EF 70-200mm f/2.8 L IS II USM  (2013: 2nd)

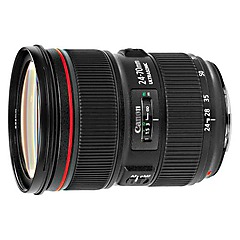
2nd ... Canon EF 24-70mm f/2.8 L II USM (2013: 3rd)

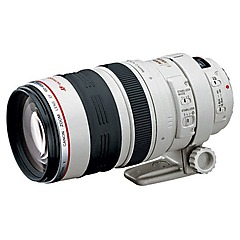
3rd ... Canon EF 100-400mm f/4.5-5.6 L IS USM (2013: 1st)

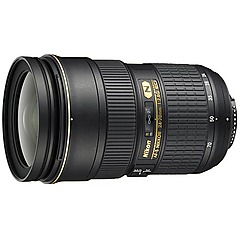
4th ... Nikon AF-S 24-70mm f/2.8 G ED (2013: 5th)

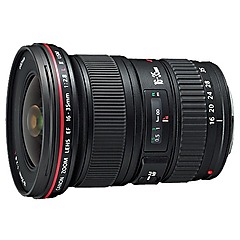
5th ... Canon EF 16-35mm f/2.8 L II USM (2013: 4th)


Thursday, January 01, 2015

Northern Lights part 3 - personal experience and conclusions

If you tuned in for parts 1 and 2 of this feature, you'll be totally up to speed with the high-ISO capabilities of your camera, and you'll have seen that in the right conditions you can get good photos of the aurora with nothing more than consumer-level DSLR equipment. If you missed them, part 1 is here and part 2 is here.

In part 3 we'll look at what can happen when the conditions aren't right - something I have experience of, unfortunately - and use this to work out what kind of equipment gives you the best chances of getting some good photos.

Iceland, December 2012

On my short trip to Iceland in 2012, we only had one night with clear skies (and no moon), but the aurora didn't show. At least, not to the naked eye. If you looked out of the corner of your eye towards the northern horizon there was a sort of glittery cloudy feel to it, but if you looked straight at it there was nothing. However, the camera proved that there was something there. This was taken using a Canon 5D (Mk I), f=18mm, ISO 3200, 30 seconds at f/2.8.


At ISO 1600 and f/4 - the limits we're assuming for consumer-grade equipment, remember - the exposure time would have had to be 2 minutes!! But that really is a sort of worst possible case. In those circumstances I'd have been quite happy to leave the camera to take a 2-minute exposure if that was the only chance I had to get something. I'd probably have taken a load of shots and overlaid them to get some star trailing, or something like that. In these dire sorts of conditions, I think your results are limited more by your imagination and your determination than by your equipment.

Norway, March 2014

In early 2014 I went to Tromsø in Norway and again the conditions weren't good. We had one night when things looked promising, but then it clouded over just as the aurora was starting to show; and we had one night when the skies eventually cleared, and we saw an aurora, but it wasn't great.

This is from the first night: Canon 6D, f=15mm, ISO 3200, 2 seconds at f/2.8. At ISO 1600 and f/4 it would have been 8 seconds, which I think would have been workable.  But you'll note that the overall illumination of the scene benefits from those clouds, which are reflecting light from some villages a couple of miles away. Without the clouds, I'd have had to use a longer exposure time or tolerate the landscape being dark and underexposed.


And these are from the second night. Both shots are with the Canon 6D, f=15mm. The first was ISO 3200, 20 seconds at f/2.8; the selfie was at ISO 5000(!!!), 15 seconds at f/2.8, and even then we had a bit of accidental help when somebody in the car park behind the camera switched on their car headlights At ISO 1600 and f/4 the exposure times would have had to be 80 seconds and about 90 seconds, which I don't think would have been workable. Certainly not for the selfie!


Observations regarding focal length

You'll have noted that all my photos were taken with ultra wide lenses with focal lengths of 15mm to 18mm on full-frame (FX) DSLRs. That's the equivalent of about 10mm on crop-sensor (DX) cameras. My personal favourite is the Canon 15mm f/2.8 fisheye, which is sadly no longer manufactured but is a super lens for the Northern Lights. (The Nikon equivalent is the Nikon 16mm f/2.8 fisheye. There are also 10mm fisheyes available for crop-sensor DSLRs.)

Could you get away with a less wide lens? Yes, you could. For example I've illustrated below how these four photos could be cropped to stimulate what you'd get with a 24mm lens (15-16mm on DX). I think they're still quite acceptable from a compositional point of view. Acceptable, but I think definitely not ideal. Until I saw a half-decent aurora in Tromsø I really had no appreciation of how much of the sky they could occupy.


 Interestingly, a 24mm focal length also allows you to use an f/1.4 lens. (For example, the Canon EF 24mm f/1.4 L II USM or the Nikon AF-S 24mm f/1.4 G ED.) I've got to admit that I'm really not sure how valuable this would be, though. On the one hand, 24mm really isn't very wide at all unless you're using a full-frame (FX) DSLR, and they can usually cope at high enough ISOs that you perhaps don't really need f/1.4. On the other hand, f/1.4 is brilliantly fast and it might well come in handy - especially if you want to keep the ISO down in order to make a big print. (Remember how the ISO capability of your camera depends on what you want to do with the image?) I guess at the end of the day having a 24mm f/1.4 lens in your bag gives you options that you wouldn't have otherwise, and that can't be a bad thing.

Conclusions and recommendations

You'll have noticed that there was a sort of common theme to my aurora photos. In the three new-moon cloudless-sky faint-aurora photos, I've relied on the fact that I could shoot at ISO 3200 or above, and that I've had an f/2.8 lens. If I had been limited to ISO 1600 and f/4 - our notional consumer-grade equipment - the exposure times for these three photos would have been in the range of 80 to 120 seconds. That's not good.

So, what have we learned?
  • You want a really wide angle lens. Fast is good but wide is essential. My four pictures here were taken with focal lengths of 15-18mm. (On a crop-sensor DSLR that's 10-12mm.) 
  • If you have moonlight and a bright aurora, you'll be fine with a consumer-grade DSLR and a wide-angle lens. But if you don't ... you might not be.
If you don't already own a full-frame camera and an ultra-wide full-frame lens, I'm not going to say that you should buy or hire one for your Northern Lights trip, for two reasons. Firstly, one very important consideration is that operating a camera in the dark really isn't easy, and you need to know your way around the controls. It could be that you'd be happier with a camera that you know well, rather than one which is theoretically superior but unfamiliar. Or perhaps not. It depends what sort of person you are, I guess, and how easily you pick these sorts of things up. And secondly, because you might not need it. If you get a good light show and good moonlight, you can get decent results with a lower-spec camera and lens. Or if it's cloudy every night, it doesn't matter what camera you've got!

But it's clear, I think, that there are definitely some conditions in which consumer-grade kit would struggle, and something like a Canon 6D / Nikon D600 (or better!) and an f/2.8 lens would cope better. At the end of the day it's for you to decide how likely you think that is, how important it is to you, and whether it's worth the money.